Have you ever wanted to look more natural in a group photo or wondered how to flatter your body type in photos? Do you dislike the way you look in photos? Or maybe you think you look great in photos but want to learn how to master that extra little, “Oompf,” taking your images to the next level.
Most people aren’t comfortable in front of a camera and it tends to show in photos. I’m sure you’ve seen the “deer in the head lights” look. Maybe you’ve even done it yourself, (if so, join the party, love.) 😉 This usually happens as soon as we get in front of a camera and any form of “just looking natural” skips out the back door.
#1. The Squinch
This is one of my favorite tips, originating from Peter Hurley, a professional head shot photographer based in NYC. To counteract the white showing around the eyes, I’m going to ask Doris to “squinch.” It’s not quite like squinting which results in tensing up your eyes until they’re just tiny slits. That’s too much. Instead, I’ll have her pull up just her bottom lid, like this.


Go ahead and try it in the mirror. The “squinch” takes a little practice but once you master it, instantly bring confidence and poise to your photo! Get “squinching” girl!
#2. The Turtle
At the beginning of this shoot I showed Doris where I wanted her to stand, stepped back, and snapped a photo, resulting in this first photo. When most of us laugh or even smile, we will often draw our chin back into our neck, showing up as the famous double chin. Not a hot look for anyone, (nope, not even Giselle.) Enter the secret jawline saver, “the turtle.” If you’ve ever studied photos of models or a professional photographer’s work you’ll notice consistent defined jawlines.
The secret to a slim neck and defined jawline is to bring your forehead out and lower your chin just a bit. This is another one to practice in the mirror. Stand in front of a mirror in a well lit room and relax into a slight “mugshot” position. Don’t over do it. (I see you!) 🙂 Now bring your forehead out several inches being careful to keep your shoulders relaxed, lower your chin, and watch as the skin on your neck and jawbone tighten and give you a beautifully defined jaw.


#3. Create Space
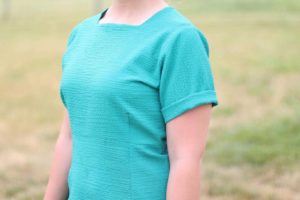
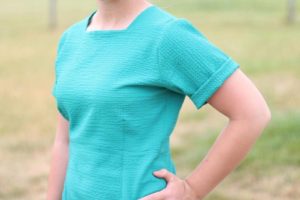
We all want to look slimmer in photos, right? The camera has a way of blowing out our actual proportions and seemingly adding pounds, UNLESS you know how to work your angles. One of the best ways to make up for this is to “create space” between your arms and torso, which immediately creates a defined waistline and slims your arms. You can either place your hand on your waist or hip, hold on to a clutch, iPhone, or even the buttons of your shirt. The key is in preventing your limbs from squishing against your body because it results in your arms flattening out and looking wider.
#4. Pop the Knee and Twist
Have you ever had a photo taken of yourself and then wondered why you look stiff and uncomfortable? You probably had one or more of your joints locked. When we pose for a photo and start freezing up, we’ll often lock our knees and hips, creating a very wide, stiff look.
The way to create an elongated silhouette is to pop your front knee and shift all your weight to your back leg. The closer a certain part of your body is to the camera, the larger it will appear. So when you shift your weight back and twist your hips and shoulders, it breaks up the boxy lines, slimming your legs and torso.


#5. Take off the Pressure
Now that you’ve read these tips, I want you to take all the pressure off yourself. Because no matter how great you are at posing, if you don’t feel good about yourself, you won’t like the way you look. I have insecurities about the way the way I look and I know you do too, but I want you to believe that you are beautiful and valuable because you’re “you.” There’s no one else like you and I want you to celebrate that. As you start to love and accept the way God made you, you unconsciously give other peoplepermission to do the same.
